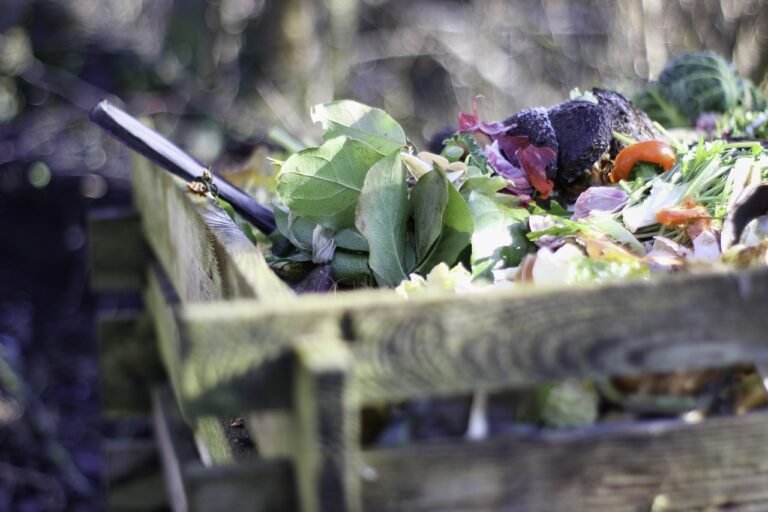
Composting is a sustainable and cost-effective way to enrich your garden soil with essential nutrients. By recycling kitchen scraps and yard waste, you can create nutrient-rich compost that enhances soil structure, promotes healthy plant growth, and reduces landfill waste. Here’s a comprehensive guide for North American readers on how to make compost for an organic garden.
1. Benefits of Composting
Soil Health:
- Improves Soil Structure: Compost enhances soil texture, aeration, and water retention.
- Nutrient-Rich: Provides a balanced mix of essential nutrients, including nitrogen, phosphorus, potassium, and trace minerals.
- Promotes Microbial Activity: Supports beneficial soil organisms that help decompose organic matter and release nutrients.
Environmental Impact:
- Reduces Waste: Diverts organic waste from landfills, reducing methane emissions and landfill space.
- Recycles Nutrients: Returns valuable nutrients to the soil, promoting a closed-loop system.
Plant Health:
- Stronger Plants: Enhances root development and overall plant health.
- Disease Resistance: Improves plants’ ability to resist diseases and pests.
2. Choosing a Composting Method
Outdoor Composting:
- Compost Pile: A simple, no-cost method where organic materials are piled directly on the ground.
- Compost Bin: Contains the compost in a bin, which can be purchased or homemade, providing a tidier appearance and protecting the compost from pests.
Indoor Composting:
- Vermicomposting: Uses worms to decompose organic matter, suitable for small spaces and indoor composting.
- Bokashi Composting: An anaerobic method using a special inoculated bran to ferment kitchen waste, ideal for indoor use.
3. Setting Up Your Compost Pile or Bin
Location:
- Accessibility: Choose a convenient location near your garden for easy access.
- Drainage: Ensure good drainage to prevent waterlogging.
- Sunlight: Partial shade is ideal to maintain moisture without excessive drying.
Materials:
- Green Materials (Nitrogen-Rich): Kitchen scraps (vegetable peels, fruit scraps, coffee grounds), grass clippings, green leaves, and fresh garden waste.
- Brown Materials (Carbon-Rich): Dry leaves, straw, wood chips, cardboard, paper, and sawdust.
Tools:
- Pitchfork or Shovel: For turning and mixing the compost.
- Compost Thermometer: Optional, but useful for monitoring the temperature of your compost pile.
- Water Source: A nearby water source for maintaining moisture levels.
4. Building Your Compost Pile
Step-by-Step Instructions:
- Prepare the Base:
- Place a layer of coarse materials (like twigs or straw) at the bottom of your compost bin or pile to promote aeration and drainage.
- Layering:
- Alternate layers of green and brown materials. Aim for a ratio of roughly 2:1 browns to greens.
- Moisture:
- Keep the compost pile moist, like a damp sponge. Water each layer lightly if needed.
- Aeration:
- Turn the compost pile every 1-2 weeks to aerate it and speed up decomposition. Use a pitchfork or shovel to mix the materials thoroughly.
- Monitoring:
- Monitor the temperature and moisture levels. A well-managed compost pile can reach temperatures of 130-160°F (55-70°C), which helps kill weed seeds and pathogens.
5. Maintaining Your Compost Pile
Temperature:
- Heat Up: A properly managed compost pile will heat up as microbes break down the organic matter.
- Cool Down: After the initial heating phase, the pile will cool down, and decomposition will continue at a slower rate.
Moisture:
- Check Regularly: Ensure the pile remains moist but not waterlogged. Add water if it becomes too dry and cover with a tarp during heavy rains.
Aeration:
- Turn the Pile: Regularly turning the compost pile helps introduce oxygen, which is essential for aerobic decomposition.
Balance:
- Adjust Materials: If the pile smells bad, it may be too wet or have too much nitrogen. Add more brown materials. If decomposition is slow, add more green materials and turn the pile.
6. Harvesting and Using Your Compost
Harvest Time:
- Decomposition Period: Compost can take anywhere from a few months to a year to mature, depending on the materials and how well the pile is managed.
- Ready Compost: The compost is ready when it is dark, crumbly, and has an earthy smell. It should no longer resemble the original materials.
Sifting:
- Remove Larger Pieces: Sift the compost to remove larger pieces that haven’t fully decomposed. These can be added back into the compost pile.
Application:
- Soil Amendment: Mix compost into garden beds to enrich the soil before planting.
- Top-Dressing: Spread compost around the base of plants during the growing season.
- Mulch: Use compost as a mulch to retain soil moisture and suppress weeds.
7. Tips for Successful Composting
Avoid Problematic Materials:
- No Meat, Dairy, or Fats: These can attract pests and cause odors.
- No Diseased Plants or Weeds with Seeds: To prevent spreading diseases and unwanted plants.
Balance Green and Brown Materials:
- 2:1 Ratio: Aim for a balance of 2 parts brown materials to 1 part green materials for optimal decomposition.
Regular Maintenance:
- Consistent Turning: Regularly turn the compost to aerate and speed up decomposition.
- Moisture Management: Maintain appropriate moisture levels to keep the composting process active.
Patience:
- Give It Time: Composting is a natural process that takes time. Be patient and monitor your pile regularly.
Making compost for your organic garden is a rewarding and environmentally friendly way to enhance soil health and promote plant growth. By following these steps and maintaining your compost pile, you can create rich, nutrient-dense compost that will benefit your garden for years to come. Embrace the practice of composting to cultivate a thriving, sustainable garden. Happy composting!
